|


Tutorial criado por
Eugênia Cló - Agosto/07/2021
Agradeço a permissão e a confiança de
Eugênia Cló em me deixar traduzir este tutorial.
Sendo que os "Direitos Autorais" do tutorial
pertence à Eugênia Cló.
Sendo proibido leva-lo para sites,blogs,aula,modificar,
traduzir,
sem a autorização da autora "Eugênia
Cló".
Obrigada.

|
Filters
*Mura's Meister - Pole
Transform
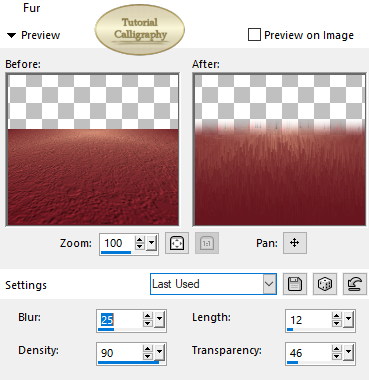
- Perspective Tiling
*Tramages - Poll Shadow |
|
Mask
*Lizztish
*Dworisch
(A
quem agradeço) |
|
Cores Usadas
 |
|
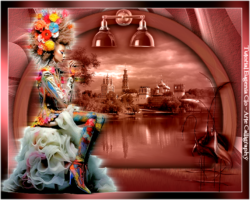
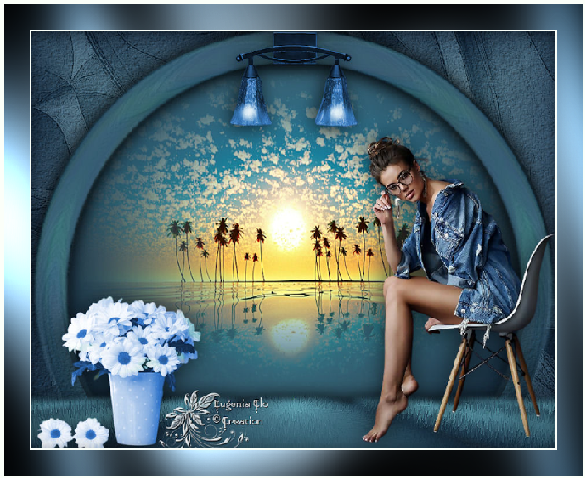
Vamos usar
*Um tube
principal
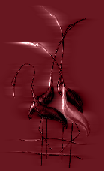
*Um tube misted
*Dois tubes
decor
|
Materiais
1- Abra uma imagem transparente de 1000 x
800px
2- Pinte com um gradiente Rectangular - 0/0
3- Layers - New Raster Layers
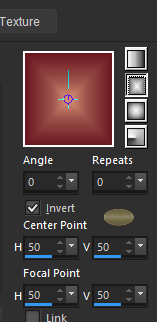
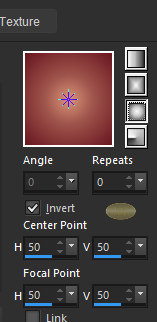
4- Pinte com um gradiente Sunburst - 0/0
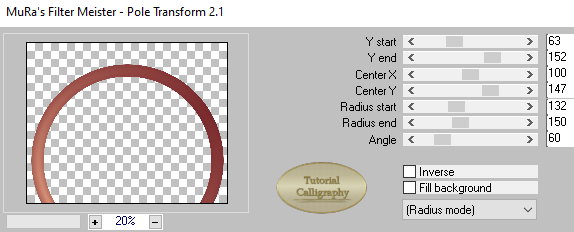
5- Plugin Mura's Meister - Pole Transform
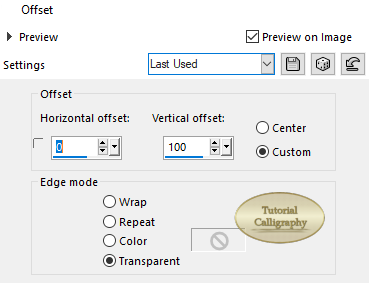
6-Effects - Image Effects - Offset
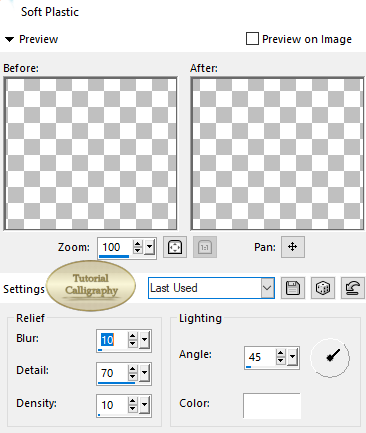
7- Effects - Texture Effects - Soft
Plastic
**Aplique 2 vezes
8-Duplique
9-Image - Mirror Horizontal
10- Tire a opacidade... deixando em 50%
11-Clique na Raster 1
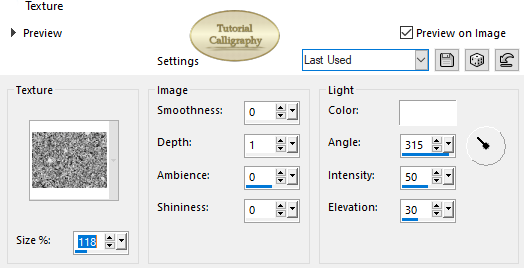
12- Image - Texture - Texture Corel 1-15- 04
13-Clique na Raster 2
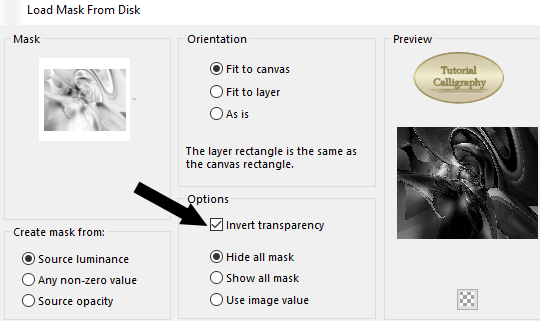
14- Selections - Load/Save Selection-Load
Selection From Disc - Sel.Sharon
15- Layers - New Raster Layers - Pinte com
um gradiente Sunburst - 0/0
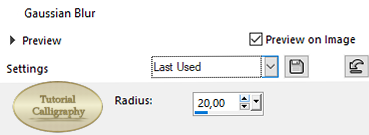
16-Adjust - Blur - Gaussian Blur
17- Layers - New Raster Layers
18- Edit copy no seu tube misted - Paste
into Selection
19-Layers - New Raster Layers
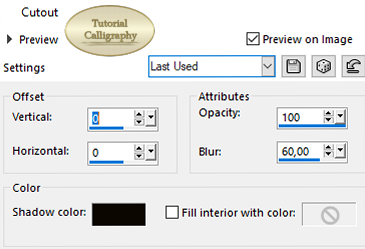
20-Effects 3D - Cutout
**Selections - Selection none
21-Clique na Raster 2
**Effects 3D - Drop Shadow - 0/0/70/50/Cor
#000000
22-Aplique a mask gradientedworisch - Layers
- Layers Merge group
**Duplique - Layers - Layers Merge Down
23-Clique na raster 1 duplique
24-Layers - Arrange - Bring to Top
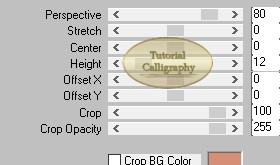
25-Plugin Mura's Meister Perspective Tiling
26-Image - Texture - Flur
27-Effects 3D - Drop Shadow - 0/0/70/50/Cor
#000000
28- Layers - New Raster Layers
** Pinte com a cor #ffffff
29- Aplique a mask lizztish_vera
**Layers - Layer Merge Group
30-Blende Mode - Luminance(legacy)
**Duplique - Layers - Layer Merge Down
31-Selections - Load/Save Selection-Load
Selection From Disc - Sel.Sharon2
**Edit Cut - Selections - Selection none
32-Edit copy no tube Lamps2_by Clo
**Ou no seu de sua
preferência
**Paste as new layer
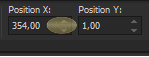
33-Clique na ferramenta Pick
Marcados : X=354,00
Y= 1,00
34- Effects 3D - Drop Shadow
5/-5/70/50/Cor #000000
35-Image - Add Borders - 2px - Cor #ffffff
36-Selections - Selections All - 35px
Pinte de qualquer cor - Selections -
Selection Invert
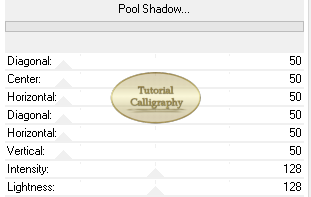
Pinte com o gradiente Sunburst 0/0
37-Plugin Tramage - Pool Shadow - Aplique 2
vezes
**Selections - Selection none
38- Edit copy no seu tube principal
**Paste As New layer
39- Edit copy no seu tube decor
**Paste As New layer
40- Edit copy no Watermack Clo@Creation
**Paste As New layer
41-Image - Add Borders - 2px - Cor #ffffff
42-Assine
e salve seu trabalho.
**Tutorial Original
*Só clicar na imagem
Traduzido por
Calligraphy - 04/02/2024

Voltar
Todos os direitos reservados à Calligraphy®
- Copyright© - 2020/2024 -
Webmaster -Calligraphy® |